Avast ye, this be a machine-translated text an’ may contain errors, aye!
Where be this information comin’ from?
Much o’ this be just a tellin’ o’ Godot’s official documentation. Below ye’ll find some useful links to the official documentation (which I mostly recommend over this one on Piggy, but if ye prefer this one, then just use it!)
Useful Booty:
What about graphics, do I need to make ‘em meself?
Nay! Ye can find a heap o’ free assets here:
Other useful booty:
Other game engines?
If ye prefer, ye can use other game engines. Examples o’ other game engines be:
There be many others too, feel free to search if ye want to try somethin’ else!
What be Godot?
Godot (Pronounced Guh-doh), be a ‘Game Engine’. To put it simple, ‘tis a program what lets ye make games (or regular programs if ye be so inclined). Godot can do most anythin’ other game-engines can do, both 2D and 3D.
Examples o’ games made in Godot: Godot Showcase
‘Tis not just Indie games what’s been made in Godot, Sonic Colors Ultimate be made with Godot!
How Do Ye Get Yer Hands on Godot?
Ye can either download Godot from:
- The official page: Godot Official Page.
- Or on Steam: Godot Steam.
Just download and install (or run on steam).
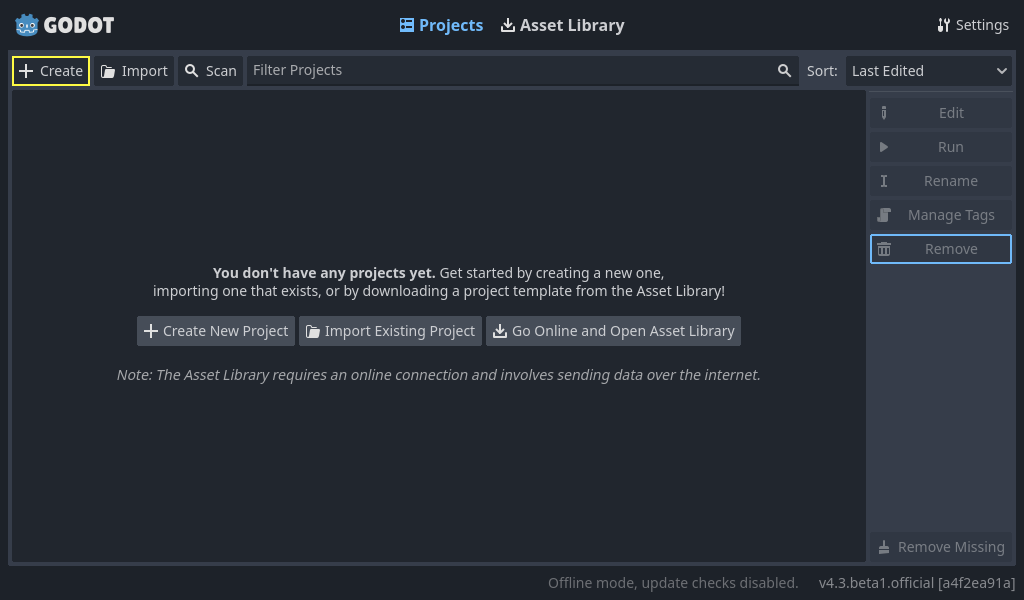
Set Up a Project!
When ye start Godot, ye get this window:
Here ye be asked about the programming language, GDScript or C#. GDScript be mighty like Python.
Differences ‘tween GDScript and Python (without colors):
def hello():
    text = "Hello world!"

    print(text)
func hello():
    var text = "Hello world!"

    print(text)
For variables in Python, ye just need to write the name o’ the variable. In GDScript, ye must write var first. To make functions, ye write func instead o’ def.
Scenes & Nodes
One o’ the most important concepts within Godot be Scenes and Nodes. We can begin with nodes. A node be an object in Godot, and it can represent anythin’. It can be somethin’ representin’ a player, a foe, a button in a menu, text on the screen, anythin’ at all. Scenes be a collection o’ nodes.
Here we be makin’ a very simple example.
Part 1a - Set Up the “Player” Scene
At the top o’ the Godot window, press the “2D” button to change the view to a 2D view.
On the left side o’ the window ye see the followin’ interface:
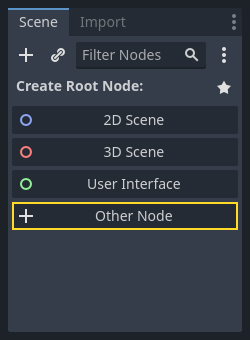
Press the “Other Node” button, an’ search fer “CharacterBody2D”, choose it, an’ press “Create”. This be a node that be used fer a 2D player. Ye might see that there be a warnin’ triangle ⚠️ beside the “CharacterBody2D” node. This be ‘cause it be missin’ some things it be wantin’.
If ye right-click on the node, there be a “+ Add Child Node…” button. Use this an’ add two nodes, Sprite2D an’ CollisionShape2D. Sprite2D be used to add some graphics to the player, while the other be used to check fer collisions. Ye can also give ‘em names if it makes it easier to keep track o’ things. I’ve given me CharacterBody2D the name “Player”. This be how the scene should look now:
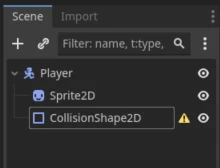
Part 1b - Fixin’ the ⚠️ on CollisionShape2D
The warnin’ triangle in this case be that the CollisionShape2D be lackin’ actual collision, matey. Ye can fix this by clickin’ on the node (to the left), then a panel shall appear on the right side. Here ye’ll find a heap o’ information about the node that ye can change. Feel free to play around with what be there. But the one we be focusin’ on is “Shape”, set this to, for example, RectangleShape2D. It ain’t much of a concern, as we won’t be usin’ the collisions here.
Part 1c - Addin’ a Sprite, Graphic
If ye click on Sprite2D to the left, ye’ll get the field to the right, where it says “Texture”. Here be where ye can put in a picture fer the player. Just drag a picture in an’ drop it in the field.
This be how it’ll look after ye’ve added a sprite.
![]()
Part 2 - Layin’ Down Input, Ye Controls
At the top o’ the window sits a menu, “Scene - Project - Debug - Editor - Help”. Tap on “Project” and then “Project Settings”. Here ye shall find a menu with a heap o’ settings. Tap on “Input Map”. Here ye can set up buttons on yer keyboard.
- In the “Add New Action” field, scrawl “left” and then tap “Add”.
- Then add “right”, “up”, and “down”.
- These be known as “Actions”
- For every “Action”, ye can add buttons by tappin’ the + button to the right.

- Here, ye just need to tap yer keyboard, then tap Add.
- Add buttons to all the actions, matey.
Part 3 - Addin’ a Script t’ Control the Player.
T’ be able t’ add game logic, that be doin’ somethin’ with the player, the background, or whatever it be in the game, we need a script. Scripts be code, and can be written in two languages, GDScript or C#, GDScript be the default.
- Press on the “CharacterBody2D” (I’ve called it “Player”) node.
- Press on the “Attach Script” button (see below)
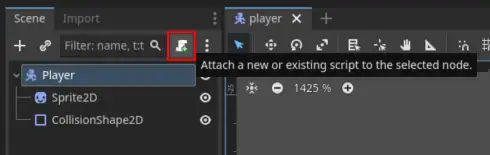
- Here ye get a window where ye can choose the language (choose GDScript) and a path (just let it be called what it be, but ye can give it a name), then press onward. Here ye get a “Script” window. Not much be standin’ here t’ begin with.
extends CharacterBody2D

# Dette er en enkel karakterkontroller
# This be a simple character controller

# Hastighet for bevegelse
# Speed fer movin'

var speed = 200
The only thing this code says at the moment is that the code shall belong to a node o’ the type “CharacterBody2D”, which be our player.
We be addin’ a function here that we be usin’ to manipulate the player:
extends CharacterBody2D

func _physics_process(delta: float) -> void:
   # Dette er en tom funksjon.
   # This be a empty function, aye.
   return
Physics Process?
_physics_process be a function that updates every single “frame,” aye, ‘round 60 times a second (default). There be another function just called _process, which updates the whole way. If ye want the player to move at a steady pace, use _physics_process.
Aye, ‘tis here we be addin’ code that moves the player.
Part 4 - Basic Input
In part 2 ye added input buttons, now we be usin’ ‘em. There be a built-in object called Input that we can use to check if the player has pressed what we set up in “Input Map”.
Try to put this code in the _physics_process code:
if Input.is_action_pressed('right'):
   # Her settes farten til høyre
   # Here be settin' the speed to starboard
   velocity.x = 100

move_and_slide()
What be move_and_slide()?
move_and_slide()be a built-in function in Godot, used when we be wantin’ to actually move what we be usin’ it on. Without this, the player won’t be movin’.
Warning
The spaces ‘tween the lines be mighty important, aye, just like in Python.
What be happenin’ when ye start the program by pressin’ the play button in the Godot window, then press ‘right’?
If naught be happenin’ now:
- Did ye remember to set somethin’ up in the “Input Map”?
- Did ye write
rightand notRight? That is, be what ye wrote in the code the same as the name in the input map?
The whole code so far
extends CharacterBody2D

func _physics_process(delta: float) -> void:
    if Input.is_action_pressed('right'):
        velocity.x = 100

    move_and_slide()
Aye, now try t’ add code fer 'left', 'up', 'down'.
What must velocity.x be fer left? What ‘bout up an’ down?
The whole code now, ye scallywag
extends CharacterBody2D

func _physics_process(delta: float) -> void:
    if Input.is_action_pressed('right'):
        velocity.x = 100
    if Input.is_action_pressed('left'):
        velocity.x = -100
    if Input.is_action_pressed('down'):
        velocity.y = 100
    if Input.is_action_pressed('up'):
        velocity.y = -100

    move_and_slide()
Part 5 - Fixin’ the Code
Ye might be noticin’ that the player don’t stops when ye lets go o’ a direction. We can fix that now!
‘Fore all the if-s, add a line that sets velocity to 0. Ye can do that by writin’ velocity = Vector2()
All speeds and directions in Godot be vectors, this be a math-concept we ain’t gonna be goin’ into now, but if ye be wonderin’ more ‘bout what this means, ye can go here: Wikipedia vectors.
The whole booty o’ code now
extends CharacterBody2D

func _physics_process(delta: float) -> void:
    velocity = Vector2()

    if Input.is_action_pressed('right'):
        velocity.x = 100
    if Input.is_action_pressed('left'):
        velocity.x = -100
    if Input.is_action_pressed('down'):
        velocity.y = 100
    if Input.is_action_pressed('up'):
        velocity.y = -100

    move_and_slide()
When ye start the game now, ye can move the player around:
Further on, ye can fix the code to make the speed not just a number, but can be stored elsewhere.
Ye can fer example (before the function) add a constant to keep track o’ the speed.
The whole code at last with const
extends CharacterBody2D

const SPEED = 100

func _physics_process(delta: float) -> void:
    velovity = Vector2()

    if Input.is_action_pressed('right'):
        velocity.x = SPEED
    if Input.is_action_pressed('left'):
        velocity.x = -SPEED
    if Input.is_action_pressed('down'):
        velocity.y = SPEED
    if Input.is_action_pressed('up'):
        velocity.y = -SPEED

    move_and_slide()
Part 6 - Play ‘Round Ye’ Own!
If ye be headin’ back to the first part, Helpful Resources, ye can find what ye can continue to play with.
After that, ye can try to make yer own game. What ye make be up to ye! If ye want to make somethin’ brand new, do it! If ye want to try to copy a game that already exists, do it! The best way to learn be to try!